
Breathtaking Guide: Install Windows Server 2022 on Virtual Machine and Fix Common Errors – Veil Defenders
Introduction
When you first step into a university or a company, one of the things you quickly notice is how seamlessly hundreds—or even thousands—of systems are managed. Every computer you log into seems secure, connected, and already tailored to your role. Behind the scenes, organizations carefully manage these systems and networks using centralized tools and well-defined security controls.
It can feel surprising at first: a single PC isn’t just a personal machine—it can host multiple user accounts, each with unique access permissions and restrictions. Whether you’re a student, an employee, or an administrator, the system knows exactly what you can and cannot do. From account sign-ins to network access, everything is governed by policies designed to ensure security, efficiency, and proper management of resources.
This blog series explores how organizations achieve this through technologies like Active Directory, DNS, DHCP, and Group Policies, and how you can set up your own lab environment to understand these concepts in action.
Understanding the process of Windows Server 2022 installation is crucial for managing these systems effectively.
Download Windows Server 2022
To begin building our lab, we first need to download Windows Server 2022. Microsoft provides an official evaluation copy that you can use for learning and practice.
Learning about the Windows Server 2022 installation process will enhance your ability to configure and troubleshoot server environments.
-
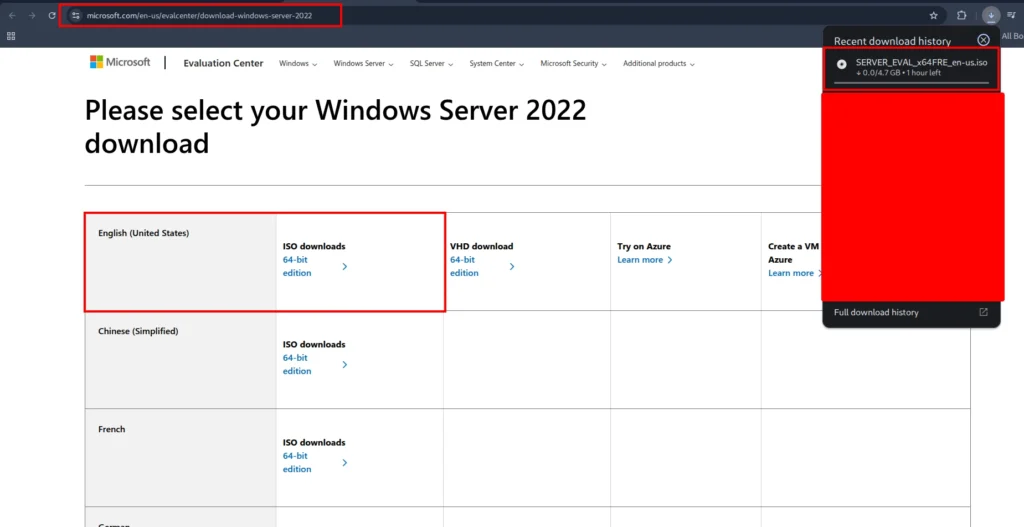
Go to the official Microsoft Evaluation Center: Download Windows Server 2022
-
Choose ISO download as the format. The ISO file will allow us to mount it inside a virtual machine (VM).
-
Select the Standard Evaluation (Desktop Experience) edition if you want the full GUI version.
-
Complete the registration form (basic details such as name, email, and region).
Once submitted, your download will start. The file size is around 4–5 GB, so it may take some time depending on your internet speed.
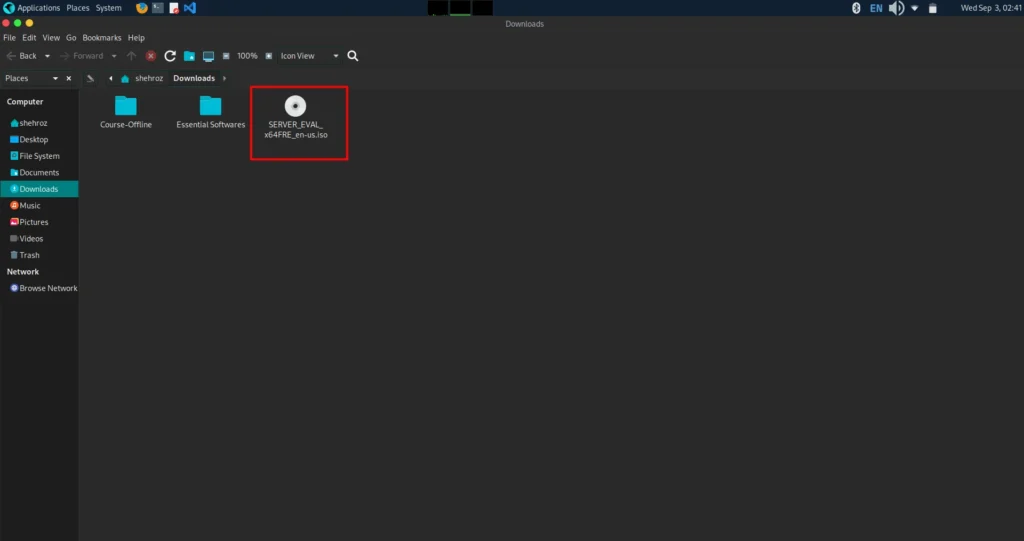
Once the Windows Server 2022 ISO has finished downloading, you’ll find it in your system’s Downloads folder (unless you selected a different location while saving).
-
-
The file will look something like this:
-
Create a New Virtual Machine Space
Now that we have the ISO ready, it’s time to create a new Virtual Machine (VM) for Windows Server 2022.
If you’ve followed my previous blog on setting up Ubuntu on a VM, you’ll remember that we selected the ISO file during the VM creation wizard. While that worked perfectly for Ubuntu, Windows Server behaves a little differently.
Important Note:
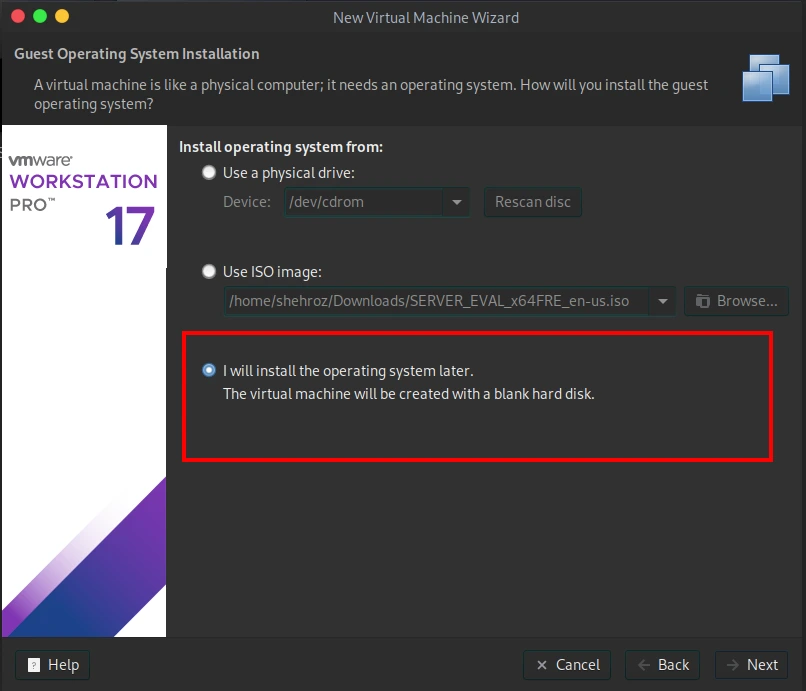
If you attach the Windows Server 2022 ISO during the initial VM creation step, the virtual machine may throw an error (as shown in the screenshot below). This happens because the installation process for Windows Server requires slightly different handling compared to lightweight Linux distributions.

- For Windows Server
- It’s better to first create the VM space without attaching the ISO, and then mount the ISO afterwards before starting the VM.
Mount the Windows Server 2022 ISO
After creating the VM space, the next step is to mount the Windows Server ISO so the virtual machine can boot from it
-
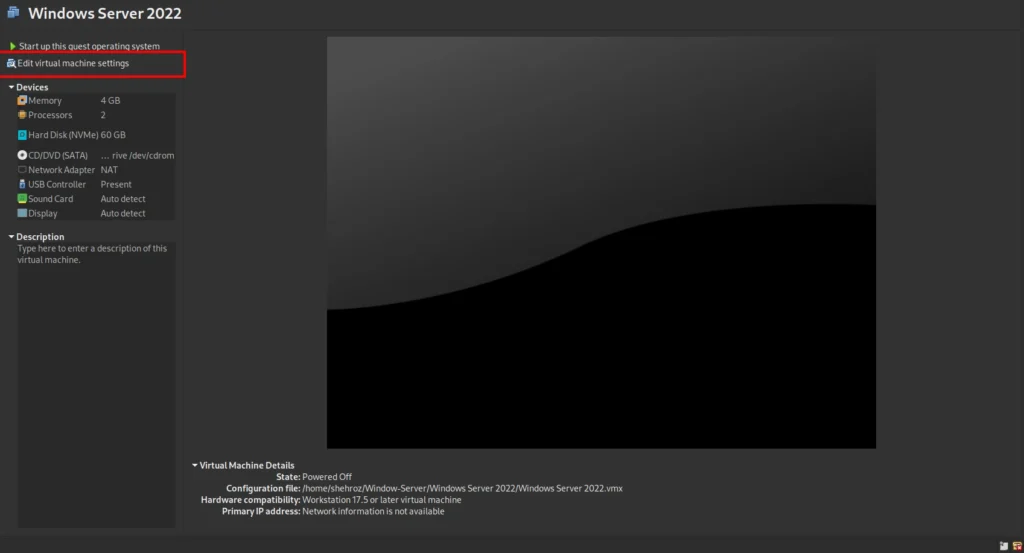
Select your newly created VM.
-
Click on Edit Virtual Machine Settings.
-
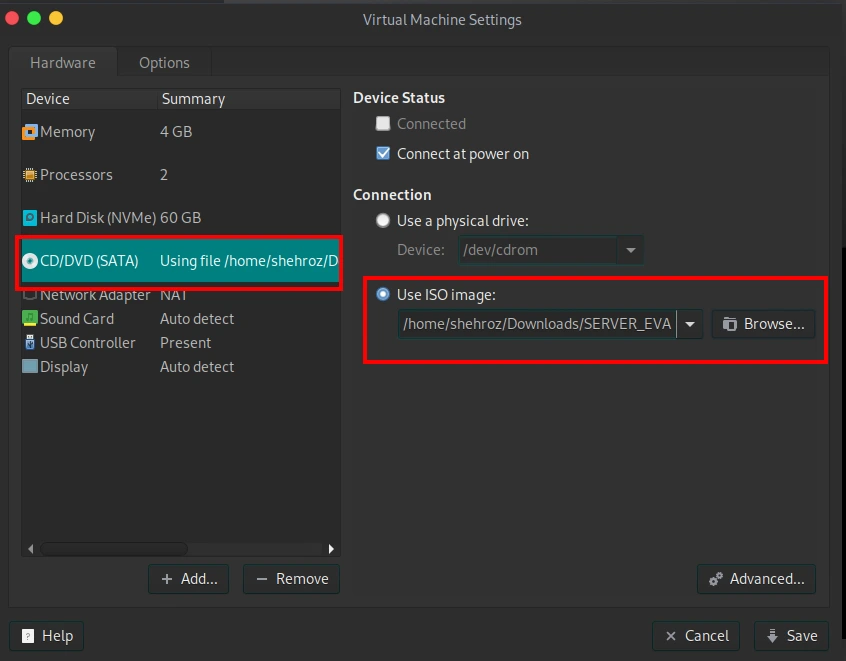
A settings window will open. From the left-hand menu, click on the CD/DVD (SATA) section.
-
Check the option Use ISO image file.
-
Click Browse, then navigate to the folder where you saved your Windows_Server_2022_Eval.iso.
-
Select the ISO file and confirm your choice.
-
Save the settings and close the window.
Now your VM is ready to boot using the Windows Server 2022 ISO. Simply power on the VM, and the installation process will begin.
Boot from the ISO
Now that the ISO is mounted, it’s time to start the installation.
-
Power on your VM.
-
On startup, you’ll see a black screen with the message:
“Press any key to boot from CD or DVD…”

-
Quickly press any key (e.g., Enter, Spacebar) to boot from the ISO.
Important:
If you don’t press a key in time, the screen will show a Timeout message and the VM will skip booting from the ISO.

If that happens, simply restart the VM and try again—this time pressing a key as soon as you see the prompt.
Once successful, the Windows Server 2022 installation setup will begin.
Start the Windows Server Installation
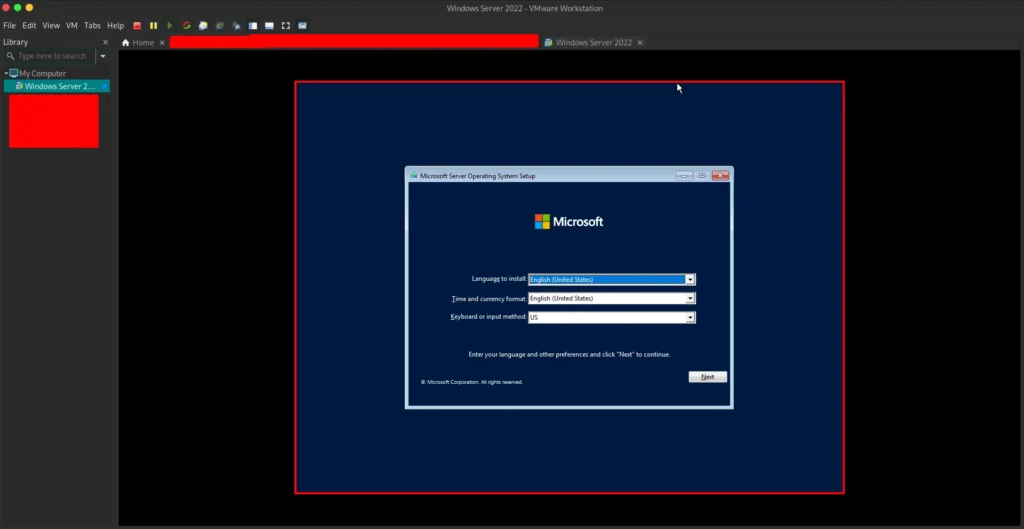
Once you successfully boot from the ISO, the Windows Server installation wizard will appear.
- Language & Preferences
-
- On the first screen, select your preferred Language, Time, and Keyboard layout.
- Click Next to continue.
-
- Select the Operating System Edition
-
- You’ll see multiple options, such as:
- Windows Server 2022 Standard Evaluation (Desktop Experience)
- Windows Server 2022 Standard Evaluation
- Make sure to select: Windows Server 2022 Standard Evaluation (Desktop Experience)
- ⚠️ If you select the version without Desktop Experience, you’ll only get a CLI installation. With Desktop Experience, you get the full GUI version, which is easier to manage.
- You’ll see multiple options, such as:

-
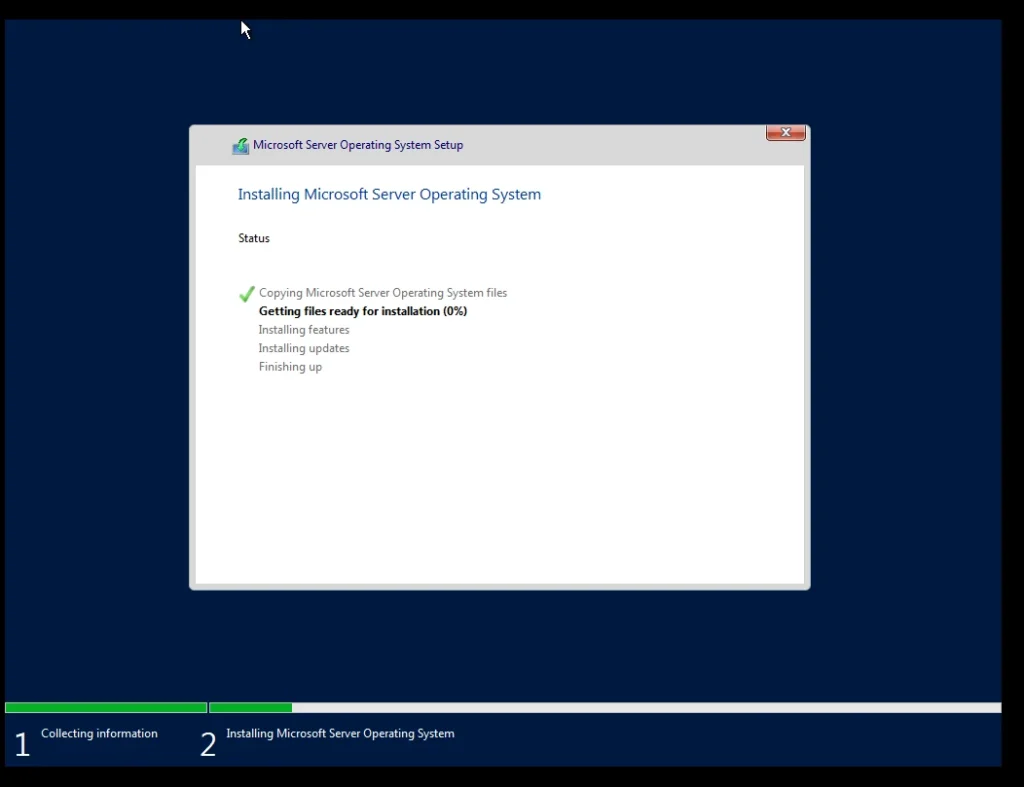
- Installation Process
-
- The setup will now begin copying and installing Windows Server files.
- This process may take several minutes depending on your system.
-
- Set Administrator Credentials
-
- Once installation completes, the system will Reboot and after Reboot prompt you to set a username and password for the Administrator account.
- Choose a strong password (uppercase, lowercase, numbers, and symbols recommended).
- This will be your main login for Windows Server.

After this step, your Windows Server 2022 machine will be ready to use.
-
First Login to Windows Server 2022
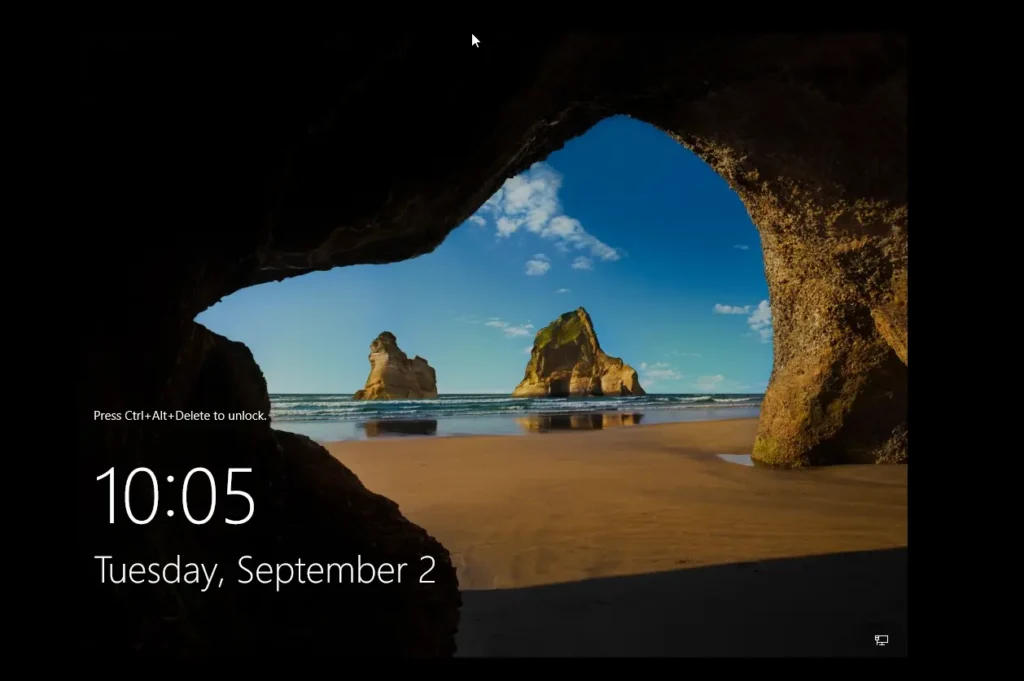
After the installation finishes and you’ve set the Administrator password, the system will restart.
-
On the login screen, press CTRL + ALT + DEL to unlock
-
Enter the Administrator password you created during setup.
-
Once logged in, the Server Manager Dashboard will automatically pop up. This is the main management console for Windows Server, where you can configure roles, features, and networking settings

Verify the Installed Version
It’s always a good idea to confirm the version of Windows Server you installed, especially if you faced any installation errors earlier.
-
Click on the Search bar (bottom left).
-
Type winver and press Enter.
-
A window will appear showing the exact version and build number of your Windows Server 2022 installation.
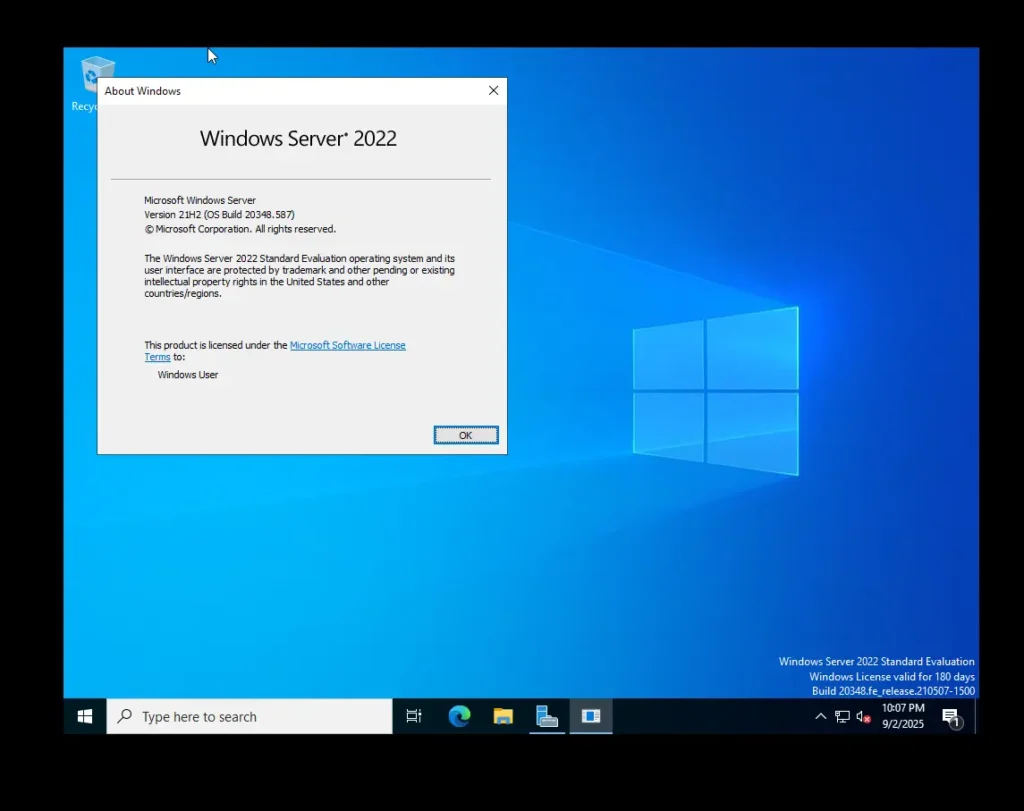 If the version matches Windows Server 2022 Standard Evaluation (Desktop Experience), then everything is set up correctly.
Conclusion
Congratulations! 🎉 You’ve successfully downloaded, installed, and logged into Windows Server 2022 on your Virtual Machine. Along the way, we also tackled common setup issues such as ISO mounting, boot errors, and edition selection—ensuring you have a smooth and error-free experience.
At this stage, your Windows Server is fully functional and ready for further configuration. In the next blog, we’ll dive deeper into setting up the network, Active Directory, and full server configuration—the real backbone of enterprise IT environments.
👉 Stay connected with Veil Defenders as we continue this journey step by step, turning your server into a fully managed and secure system.
One Comment